
Hardware acceleration refers to the process by which an application will offload certain computing tasks onto specialized hardware components within the system, enabling greater efficiency than software running on general-purpose CPUs alone. Windows operating system does allow these features and one can use it to maximize the system potential to execute certain tasks.
Wondering how? In this article, we will look at 3 ways to enable hardware acceleration. The instruction is suitable for any version of Windows.
Table of Contents
Check for hardware acceleration activation
In the latest versions of Windows, hardware acceleration is enabled by default. In this case, you do not need to make any changes.
To check if hardware acceleration is enabled, do the following:
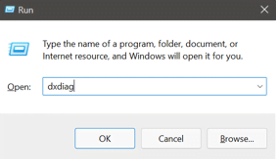
- Press the key combination (start button on the keyboard) WIN + R simultenously.
- In the window that opens, enter the command “dxdiag”, without quotes and press “OK” or Enter.
- From the Directx Diagnostic Tool menu, click the Display tab.
- Scroll down to the Directx Features block.
- Make sure that all menu items of the block have the status “On”.
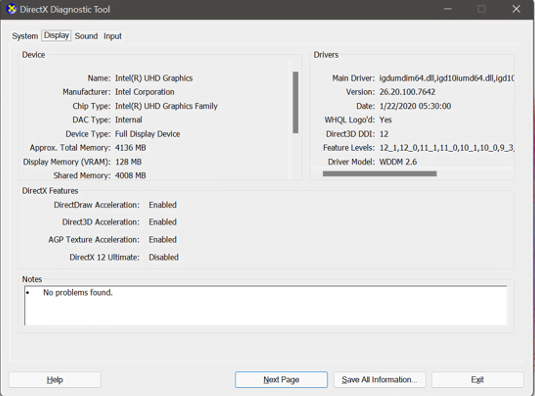
If at least one of the items is “No” (“Off”), then you will need to search for the problem and manually fix it using the methods below.
Method number 1: updating the Directx libraries
Libraries include components that enable software to additionally interact with audio and video equipment, to use their power. If the version is outdated, there are difficulties with launching games and applications.
To update Directx, follow the link to the official Microsoft website: https://www.microsoft.com/en-us/download/details.aspx?id=35
Download the installation file for DirectX executable libraries dxwebsetup.exe and run. Follow the installation sequence.
The procedure may take some time. You cannot interrupt it. After the installation is complete, restart your computer.
Method number 2: updating video card drivers
Outdated graphics drivers are often the cause of poor performance. This is especially true if you have Nvidia or AMD discrete graphics cards.
In order to update the drivers, do the following:
- Go to the official website of the video card manufacturer https://www.nvidia.ru/ or https://www.amd.com/.
- Specify in the “Drivers” section your video card series and search for the current version on the site. Download the installer file, but don’t run it.
- Uninstall the old driver from your computer. We already wrote: how to remove the old version of the video card drivers .
- After uninstalling, run the installer file of the previously downloaded drivers. Follow the installation procedure.
After completing the process, restart your computer and check the activation of hardware acceleration, via “dxdiag” (described at the beginning).
Method number 3: enable hardware acceleration for the browser
Since most users use the Google Chrome browser, we will give instructions on its example. When working with other web browsers, the procedure will be the same.
To enable hardware acceleration for your browser, do the following:
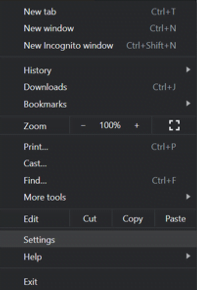
- Open the “Settings” menu by clicking on the ellipsis in the upper right corner of the window.
- In the settings search box (as shown in the picture), enter “hardware acceleration”.
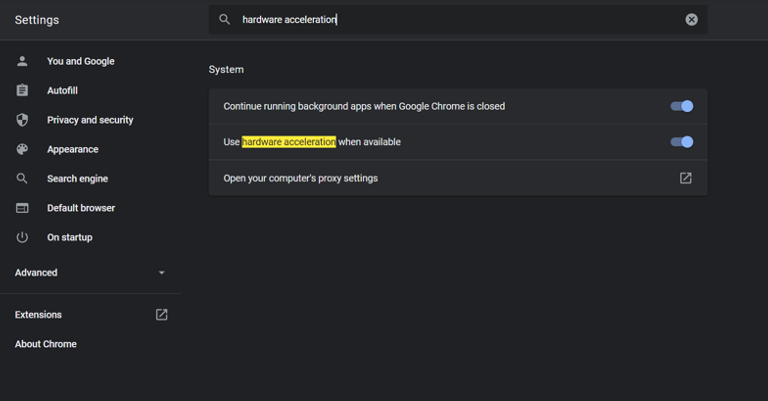
- Activate opposite to the “On” position. or put a check mark (move to the right, turns blue).
Now restart your browser by closing and reopening it.
Strict adherence to the above algorithms will solve the problem of low PC performance when running capacious applications and computer games. The only thing worth remembering is that the process of installing updates, it is not recommended to interrupt drivers.
That’s all folks. Hope this article was helpful to enable hardware acceleration on your device. If you have any questions, then do let us know in the comment section.