Converting image formats is a common task for many MacOS users, especially when dealing with screenshots or images for online use. While I’m not sure how often you find yourself converting images from one file format to another, I personally find it incredibly convenient, particularly when I need to upload a screenshot or image in PNG format to our website. MacOS provides a quick solution, allowing me to convert images into different file formats such as JPEG, PNG, GIF, BMP, TIFF, HEIC, and PDF.
While many apps let you convert images from one file format to another, you can likewise do this directly from macOS. This means, that as a Mac user, you can do it without installing any additional software.
Alright, let’s move forward and see how I usually convert images from one file format to another. And if you ever need to do it, you can follow the steps below.
Table of Contents
What are the differences between PNG and JPEG?
Before diving into the conversion process, it’s important to understand the differences between PNG and JPEG formats. Despite their similarities and widespread use, there are many differences between PNG and JPEG files.
PNG (Portable Network Graphics) is a lossless format known for its support of transparent backgrounds, making it ideal for graphics and images with sharp edges. On the other hand, JPEG (Joint Photographic Experts Group) is a lossy format that excels in compressing photographs and images with gradients, resulting in smaller file sizes suitable for web use.
Convert PNG to JPEG Files Using Preview
Using the built-in Preview app and converting a PNG file to a JPEG file is straightforward. Here’s how:
1. Open the PNG image using the Preview application.
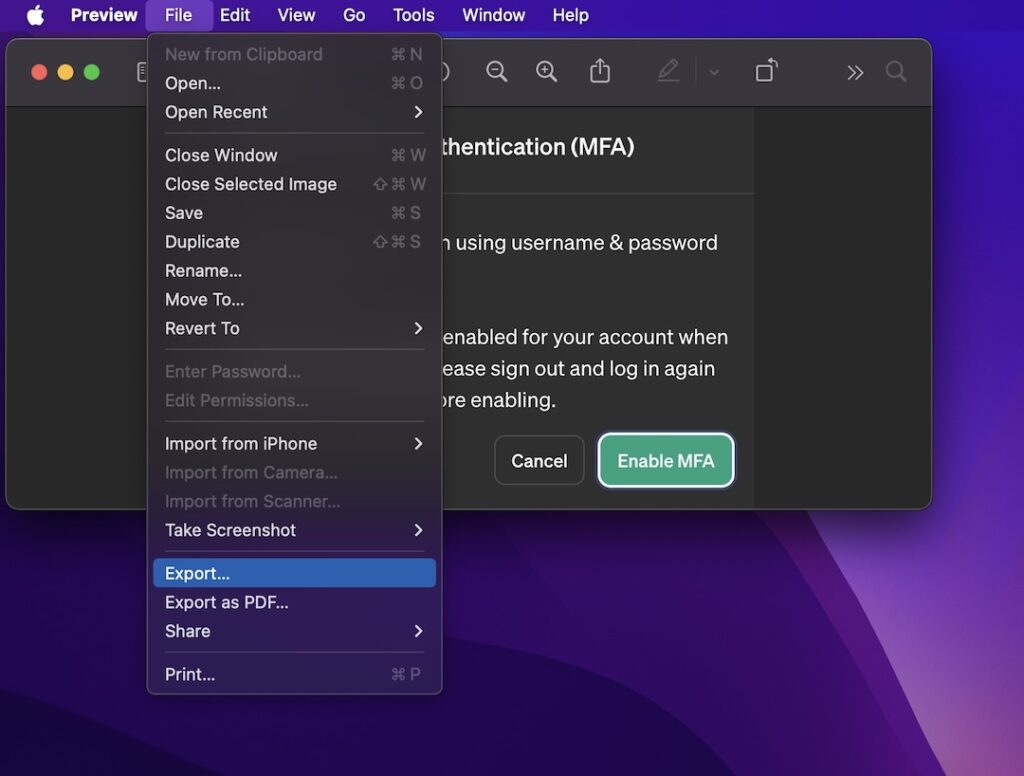
2. Now, go to File > Export from the menu bar.

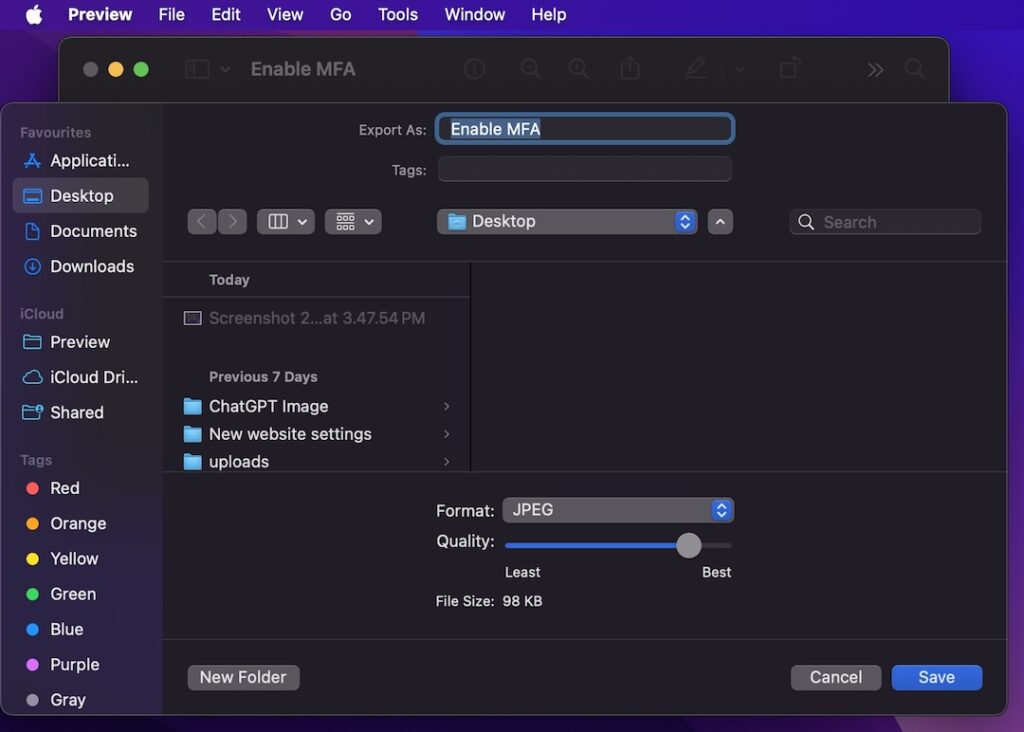
3. Next, select JPEG as your file format, and set your required quality using the slider.

4. Choose JPEG as the file format and adjust the quality as needed.
5. Enter a name and specify a location for your output file, then press Save.
This will convert your PNG file to a JPEG file, ready to use! Likewise, you can also convert JPEG files to PNG or any other format of your choice.
Convert PNG to JPEG Using Quick Actions
Alternatively, you can use Quick Actions in Finder to convert PNGs to JPEGs. Follow these steps:
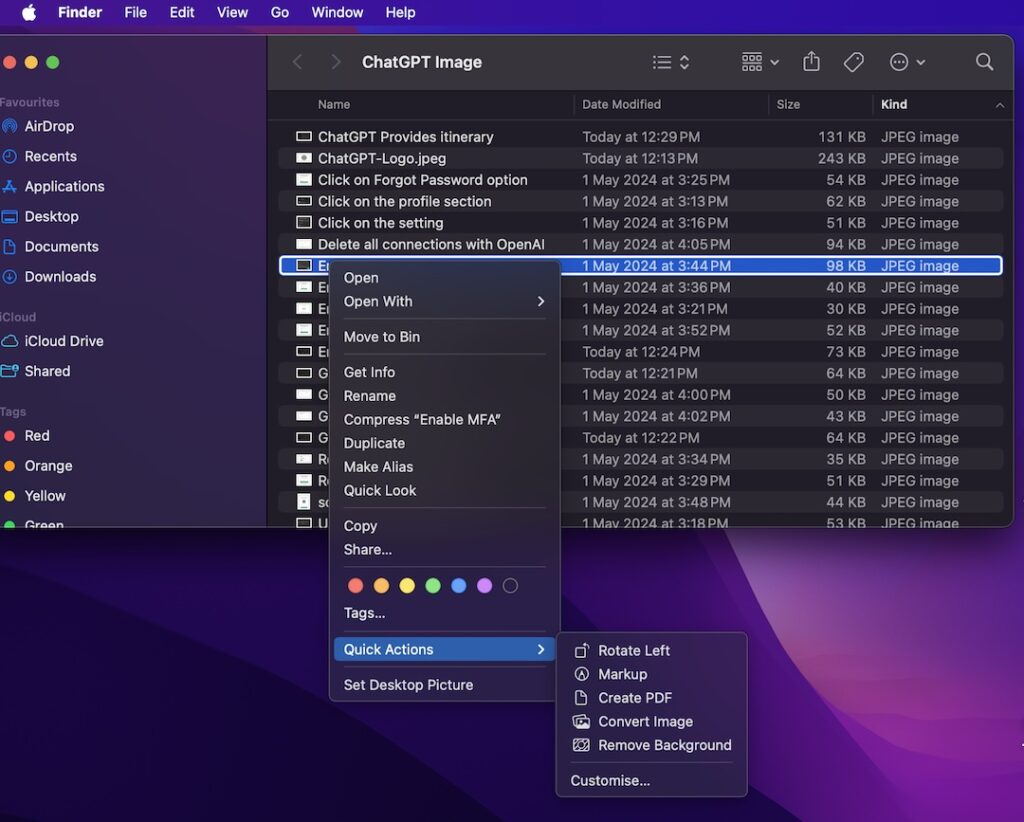
1. In Finder, Control-click on the PNG image you want to convert.
2. Hover over Quick Actions in the context menu and choose Convert Image.

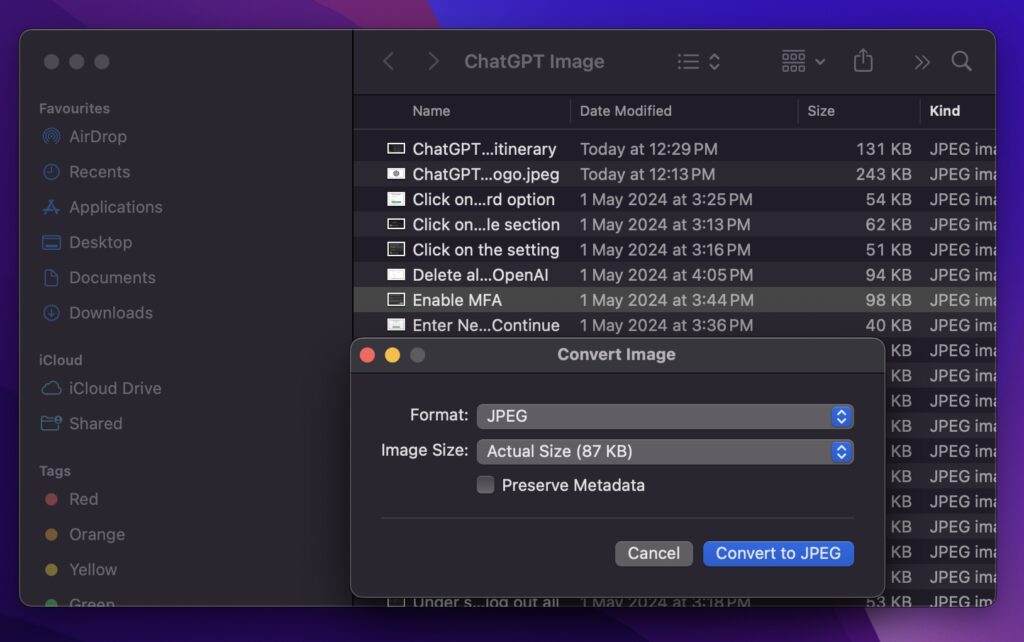
3. Select JPEG format and adjust image size if necessary, then click Convert to JPEG.

4. The JPEG file will be saved in the same location as the original PNG. Rename it as needed and press Enter to save.
Navigating MacOS Image Formats
As you can see, converting PNG files to JPEG on MacOS is straightforward and can be done using built-in tools like Preview and Quick Actions. Consider your specific needs, such as image quality and file size, when choosing between these methods. Additionally, exploring other formats like TIFF for high-quality prints or HEIC for Apple devices can further enhance your image management experience on MacOS. Don’t forget to customize your default screenshot format for added convenience.
Read More: Best Online PDF To Word Converters

