
Microsoft Word is one of the most sought-after office productivity software due to its rich features and easy-to-use interface. It has several features that are available to help make documents more attractive. One feature that is particularly contentious, however, is the automatic insertion of a horizontal line when you type -, ===, or ___.
While inserting a horizontal line is one way to make information stand out, once it is there, getting rid of it can prove challenging. You can try using the “Delete” or “Backspace” keys, but they won’t work because horizontal lines are not counted as a single character.
No worries! Read on to learn how to delete a horizontal line from your Word document, and see our FAQ for more line tips.
Table of Contents
How to Delete a Horizontal Line in Word?
To delete the horizontal line in your Word document quickly, follow below the steps:
- Launch the Word application and access the document you wish to delete the horizontal line from.
- From the “Ribbon,” select the “Home” tab.
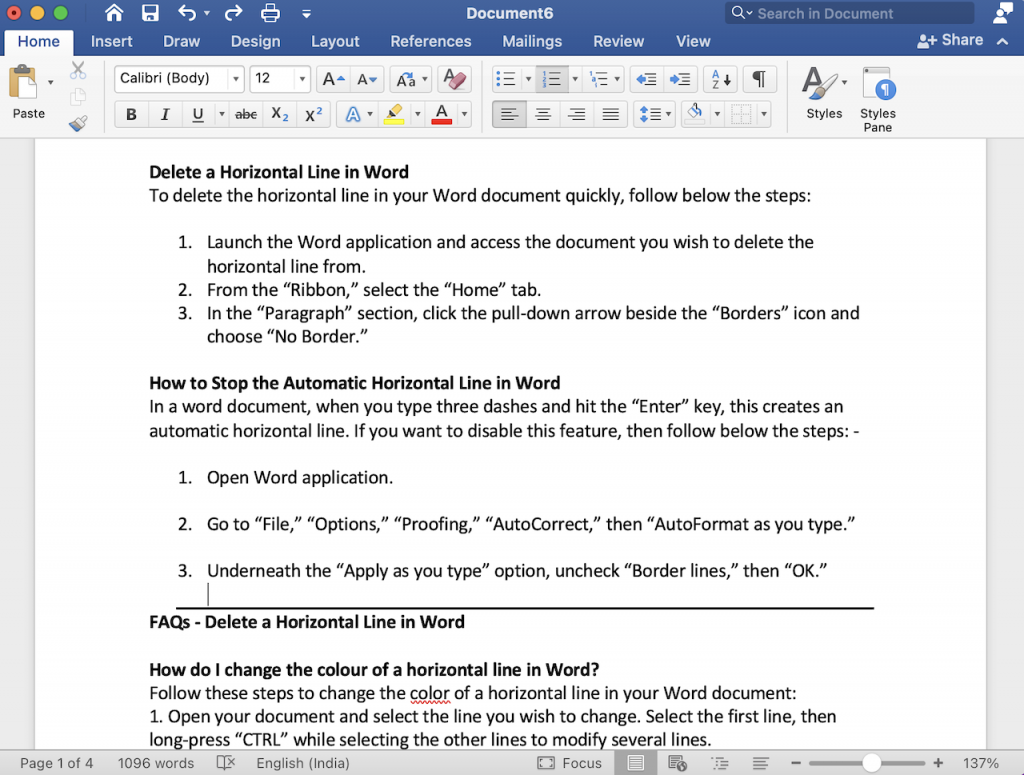
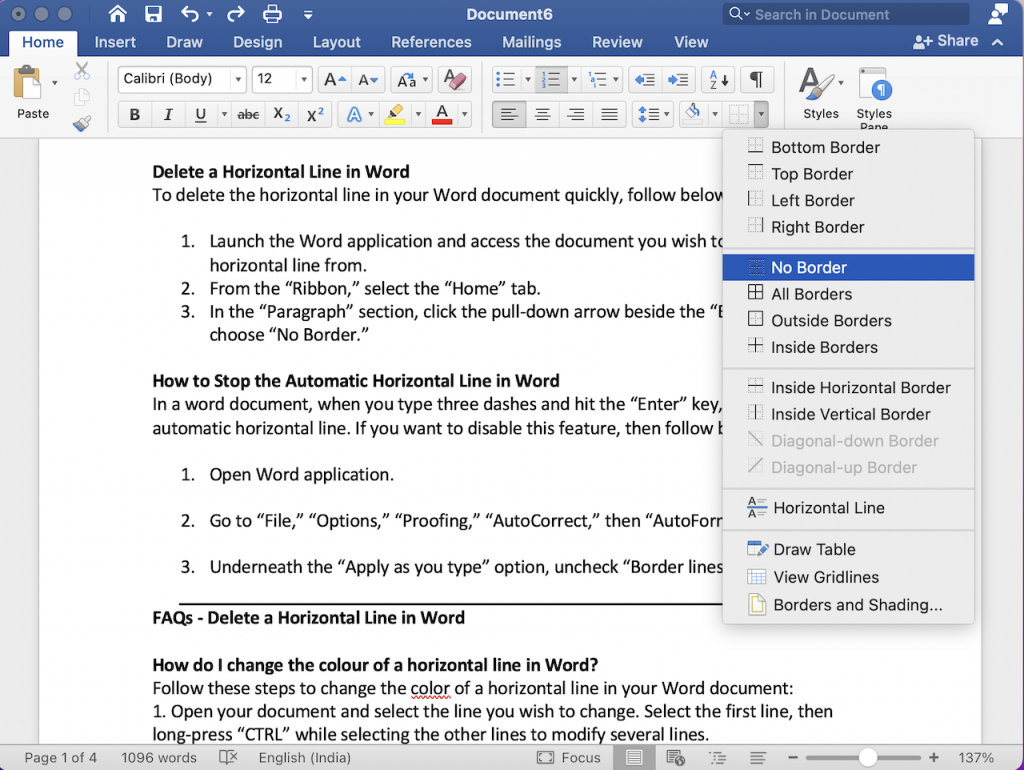
- In the “Paragraph” section, click the pull-down arrow beside the “Borders” icon and choose “No Border.”
That’s all. The Horizontal line will automatically disappear from the document.
How to Stop the Automatic Horizontal Line in Word?
In a word document, when you type three dashes and hit the “Enter” key, this creates an automatic horizontal line. If you want to disable this feature, then follow below the steps: –
- Open Word application.
- Go to “File,” “Options,” “Proofing,” “AutoCorrect,” then “AutoFormat as you type.”
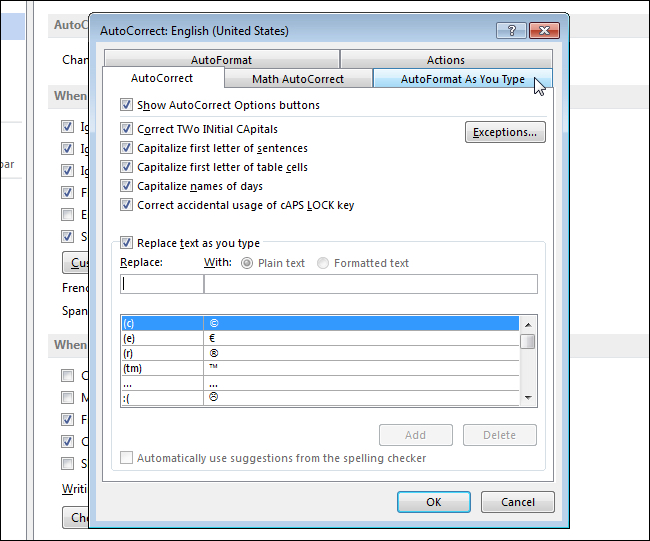
- Underneath the “Apply as you type” option, uncheck “Border lines,” then “OK.”

FAQs – Delete a Horizontal Line in Word
#How do I change the color of a horizontal line in Word?
Follow these steps to change the color of a horizontal line in your Word document:
- Open your document and select the line you wish to change. Select the first line, then long-press “CTRL” while selecting the other lines to modify several lines.
- From the “Format” tab, select the arrow beside “Shape Outline,” then select the new color.
- To choose a non-theme color, choose “More Outline Colors,” then select the color you want from the “Standard” tab. Or you can mix your own color using the “Custom” tab.
#How do I edit a line in a Word template?
You need to follow the below steps to alter a line in a Word template:
- Open Word, then go to “File” and “Open.”
- Double-click “This PC” or “Computer.”
- Go to the “Custom Office Templates” folder beneath “My Documents.”
- Click on your template, then “Open.”
- Choose the “Format” tab, then select the arrow next to “Shape Outline” for options to make changes to the line.
- Once you’re done editing the line, save the template.
#How do I remove a vertical line from my document?
In order to remove a vertical line or column from your Word document, you need to follow below the steps:-
- Launch the document you wish to amend.
- Select the “Layout” tab from the Ribbon.
- From the “Page Setup,” beneath “Columns,” click on the down arrow and choose “More Columns.”
- At “Number of columns,” enter a number or use the arrows to select one.
#“No Border” to Delete Horizontal Line
Microsoft Word provides many features to help make your documents more accessible. For example, you can insert lines to make sections of content unique, easy to digest, or visually appealing. If you change your mind about a horizontal line and want to remove it, the easiest way is to select “No Border” via the “Paragraph” section.
What features do you use to help make your Word documents more interesting? Tell us in the comments section below.